Today is all about adding those last minute holiday touches to your space. I always like to have people greeted at the door with some holiday cheer. This is why I love to have a fabulous wreath hanging on the front door. I will admit I threw away the old wreath about two years ago and have meant to make a new one ever since. This year was the year it finally happened. We used sales at Michael’s and 50% off coupons to get all the supplies we needed right after Thanksgiving. However, you still have time to get last minute supplies for less. Most of the craft stores already have all their Christmas stuff 70% off. It’s an affordable way to add an expensive looking decoration to your space. Keep reading to find out how we did it.
Supplies:
18-24” wreath form
Christmas Ribbon (we used 2 different ribbons)
Spray Paint (needed if you have embellishments that need painting, we had an “E”)
Twine
Glue Gun and Glue Sticks
Embellishments of your choice – we used berry picks, snowflakes, poinsettias, pinecones, and acorns. (We collected the pinecones and acorns from the cabin we spent Thanksgiving at)
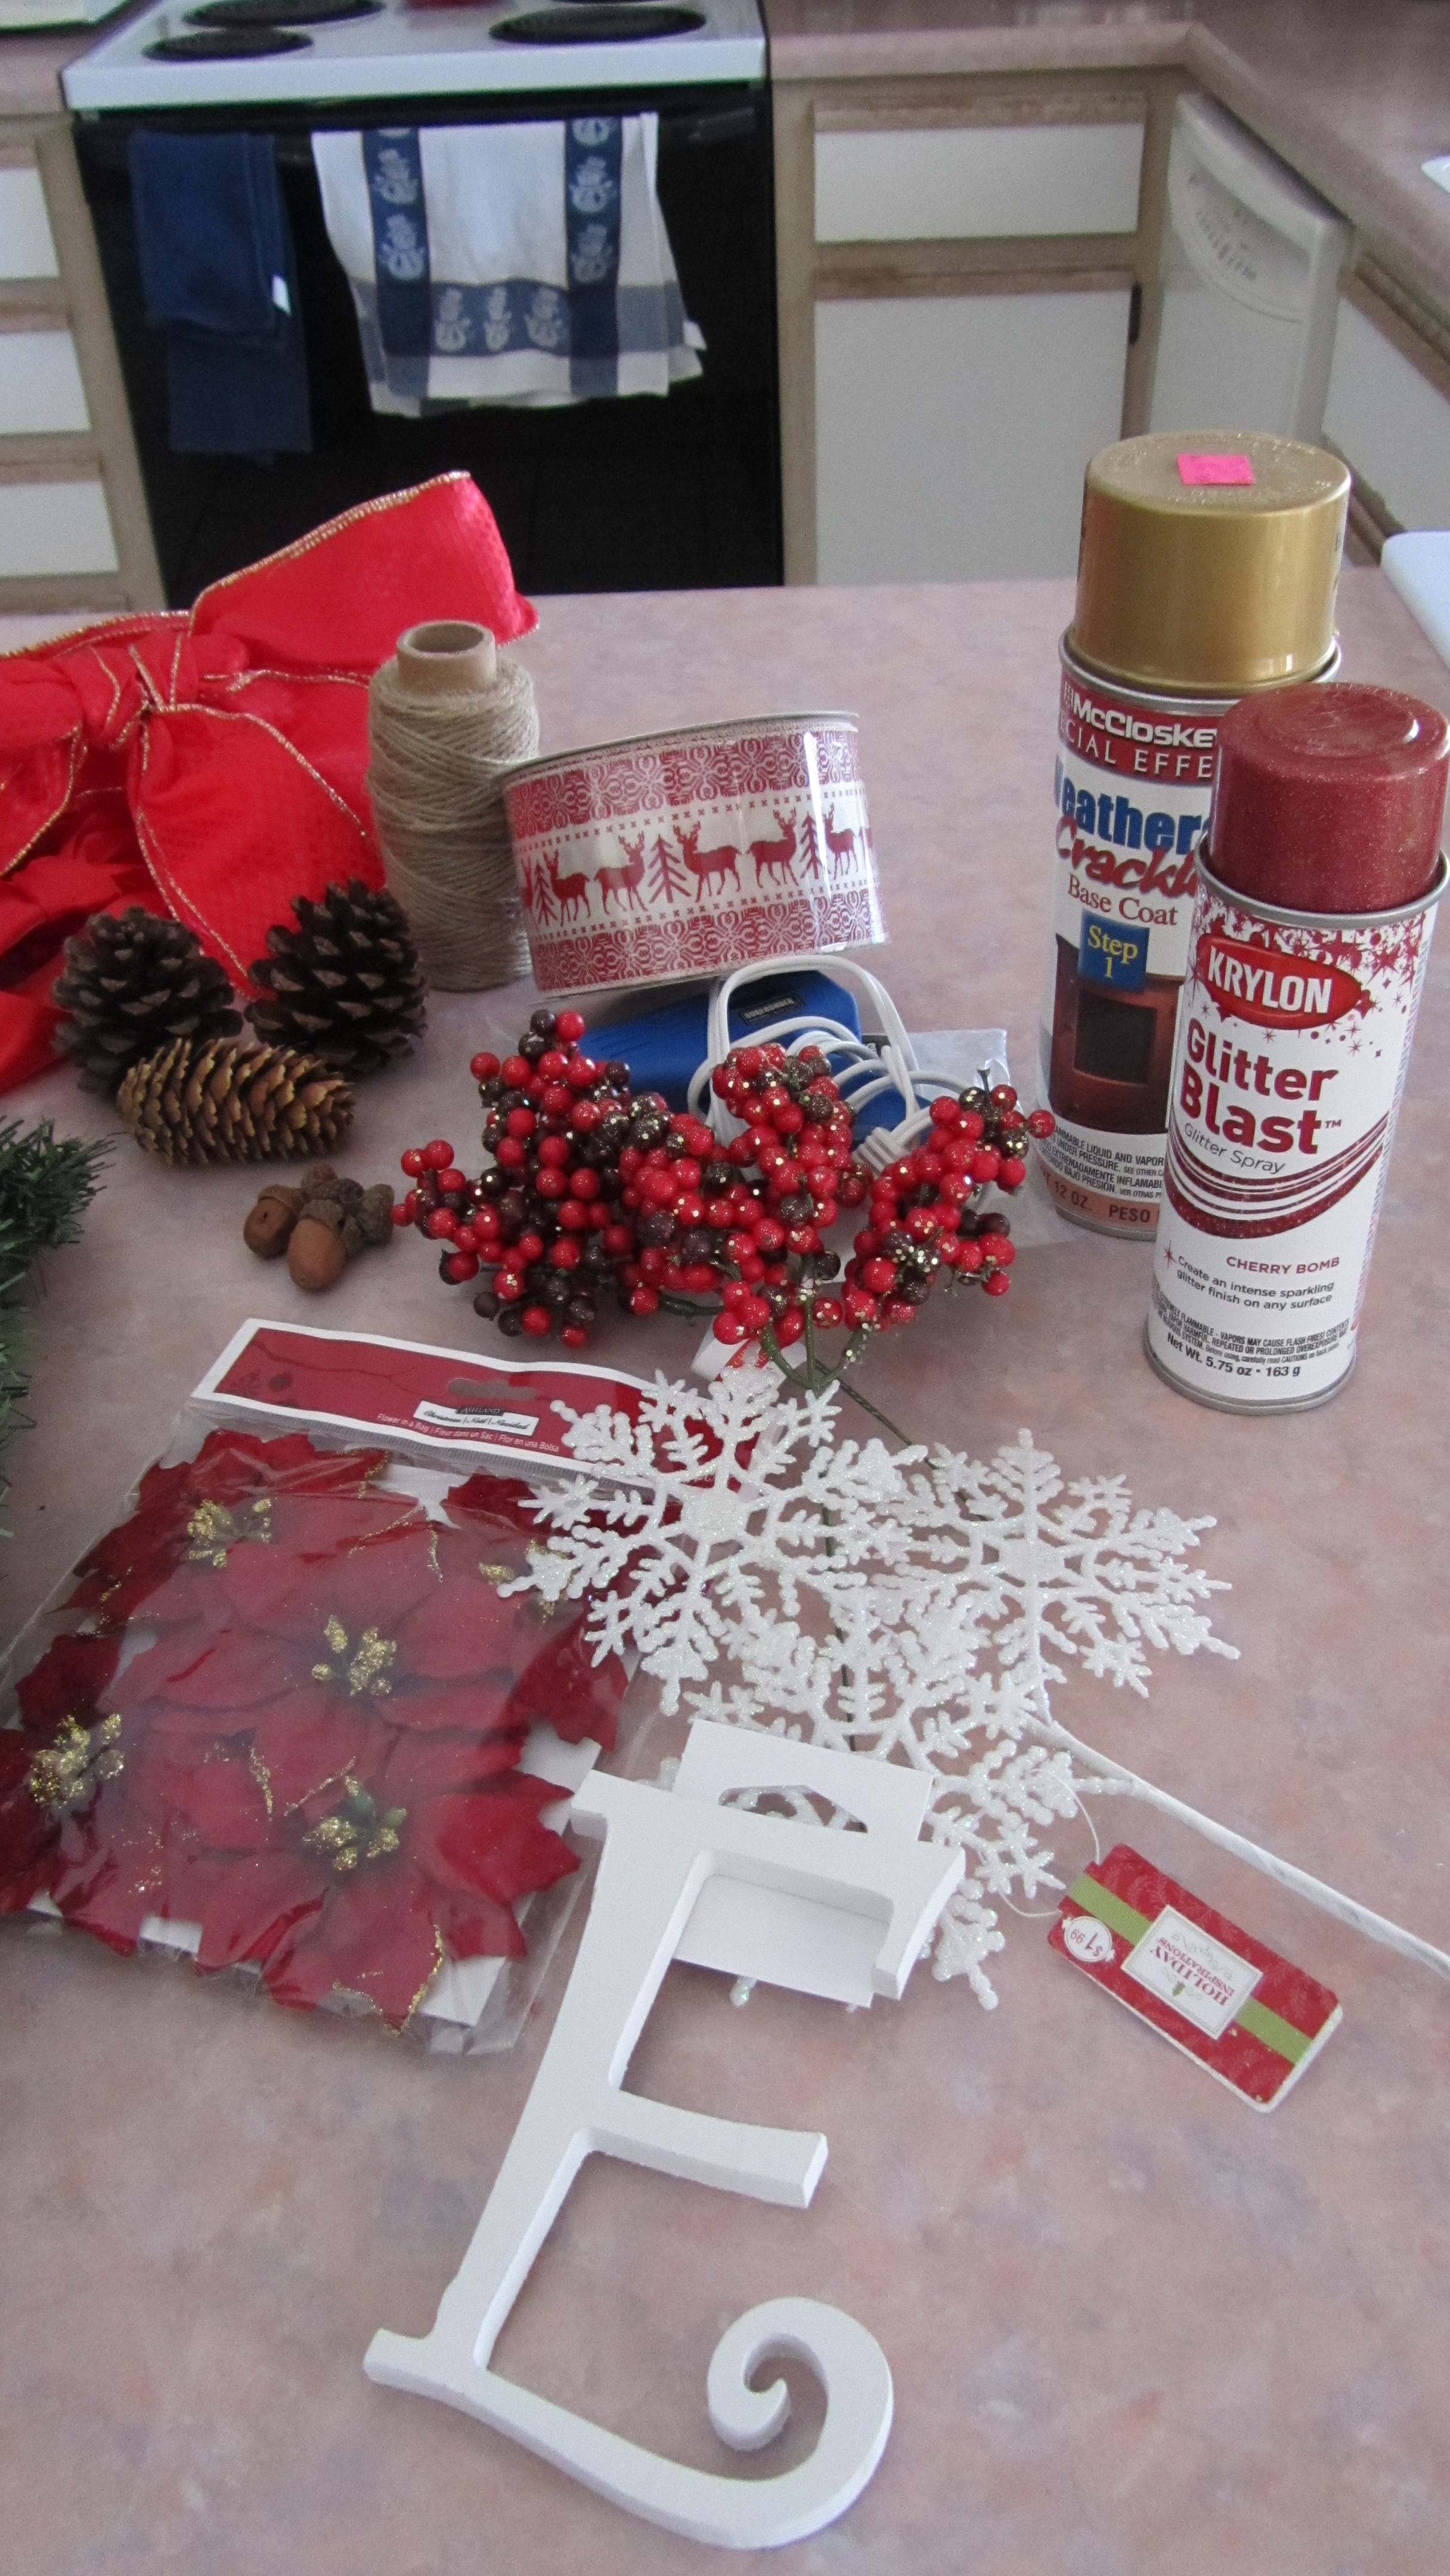
Supplies
Directions:
1.) First we went to the door and looked to see about where we wanted the wreath to hang so we knew how much twine to use. Then we flipped our wreath form over and tied twine to the back wire frame in order have a secure string to hang the wreath from. Our wire form had metal ties on it holding the faux pine to the form. We tied the knots in our twine to the underside of those ties so there was something stopping it from moving around when the wreath was hanging. Double knot the twine and make sure everything is secure. This is what will secure the wreath when hanging.
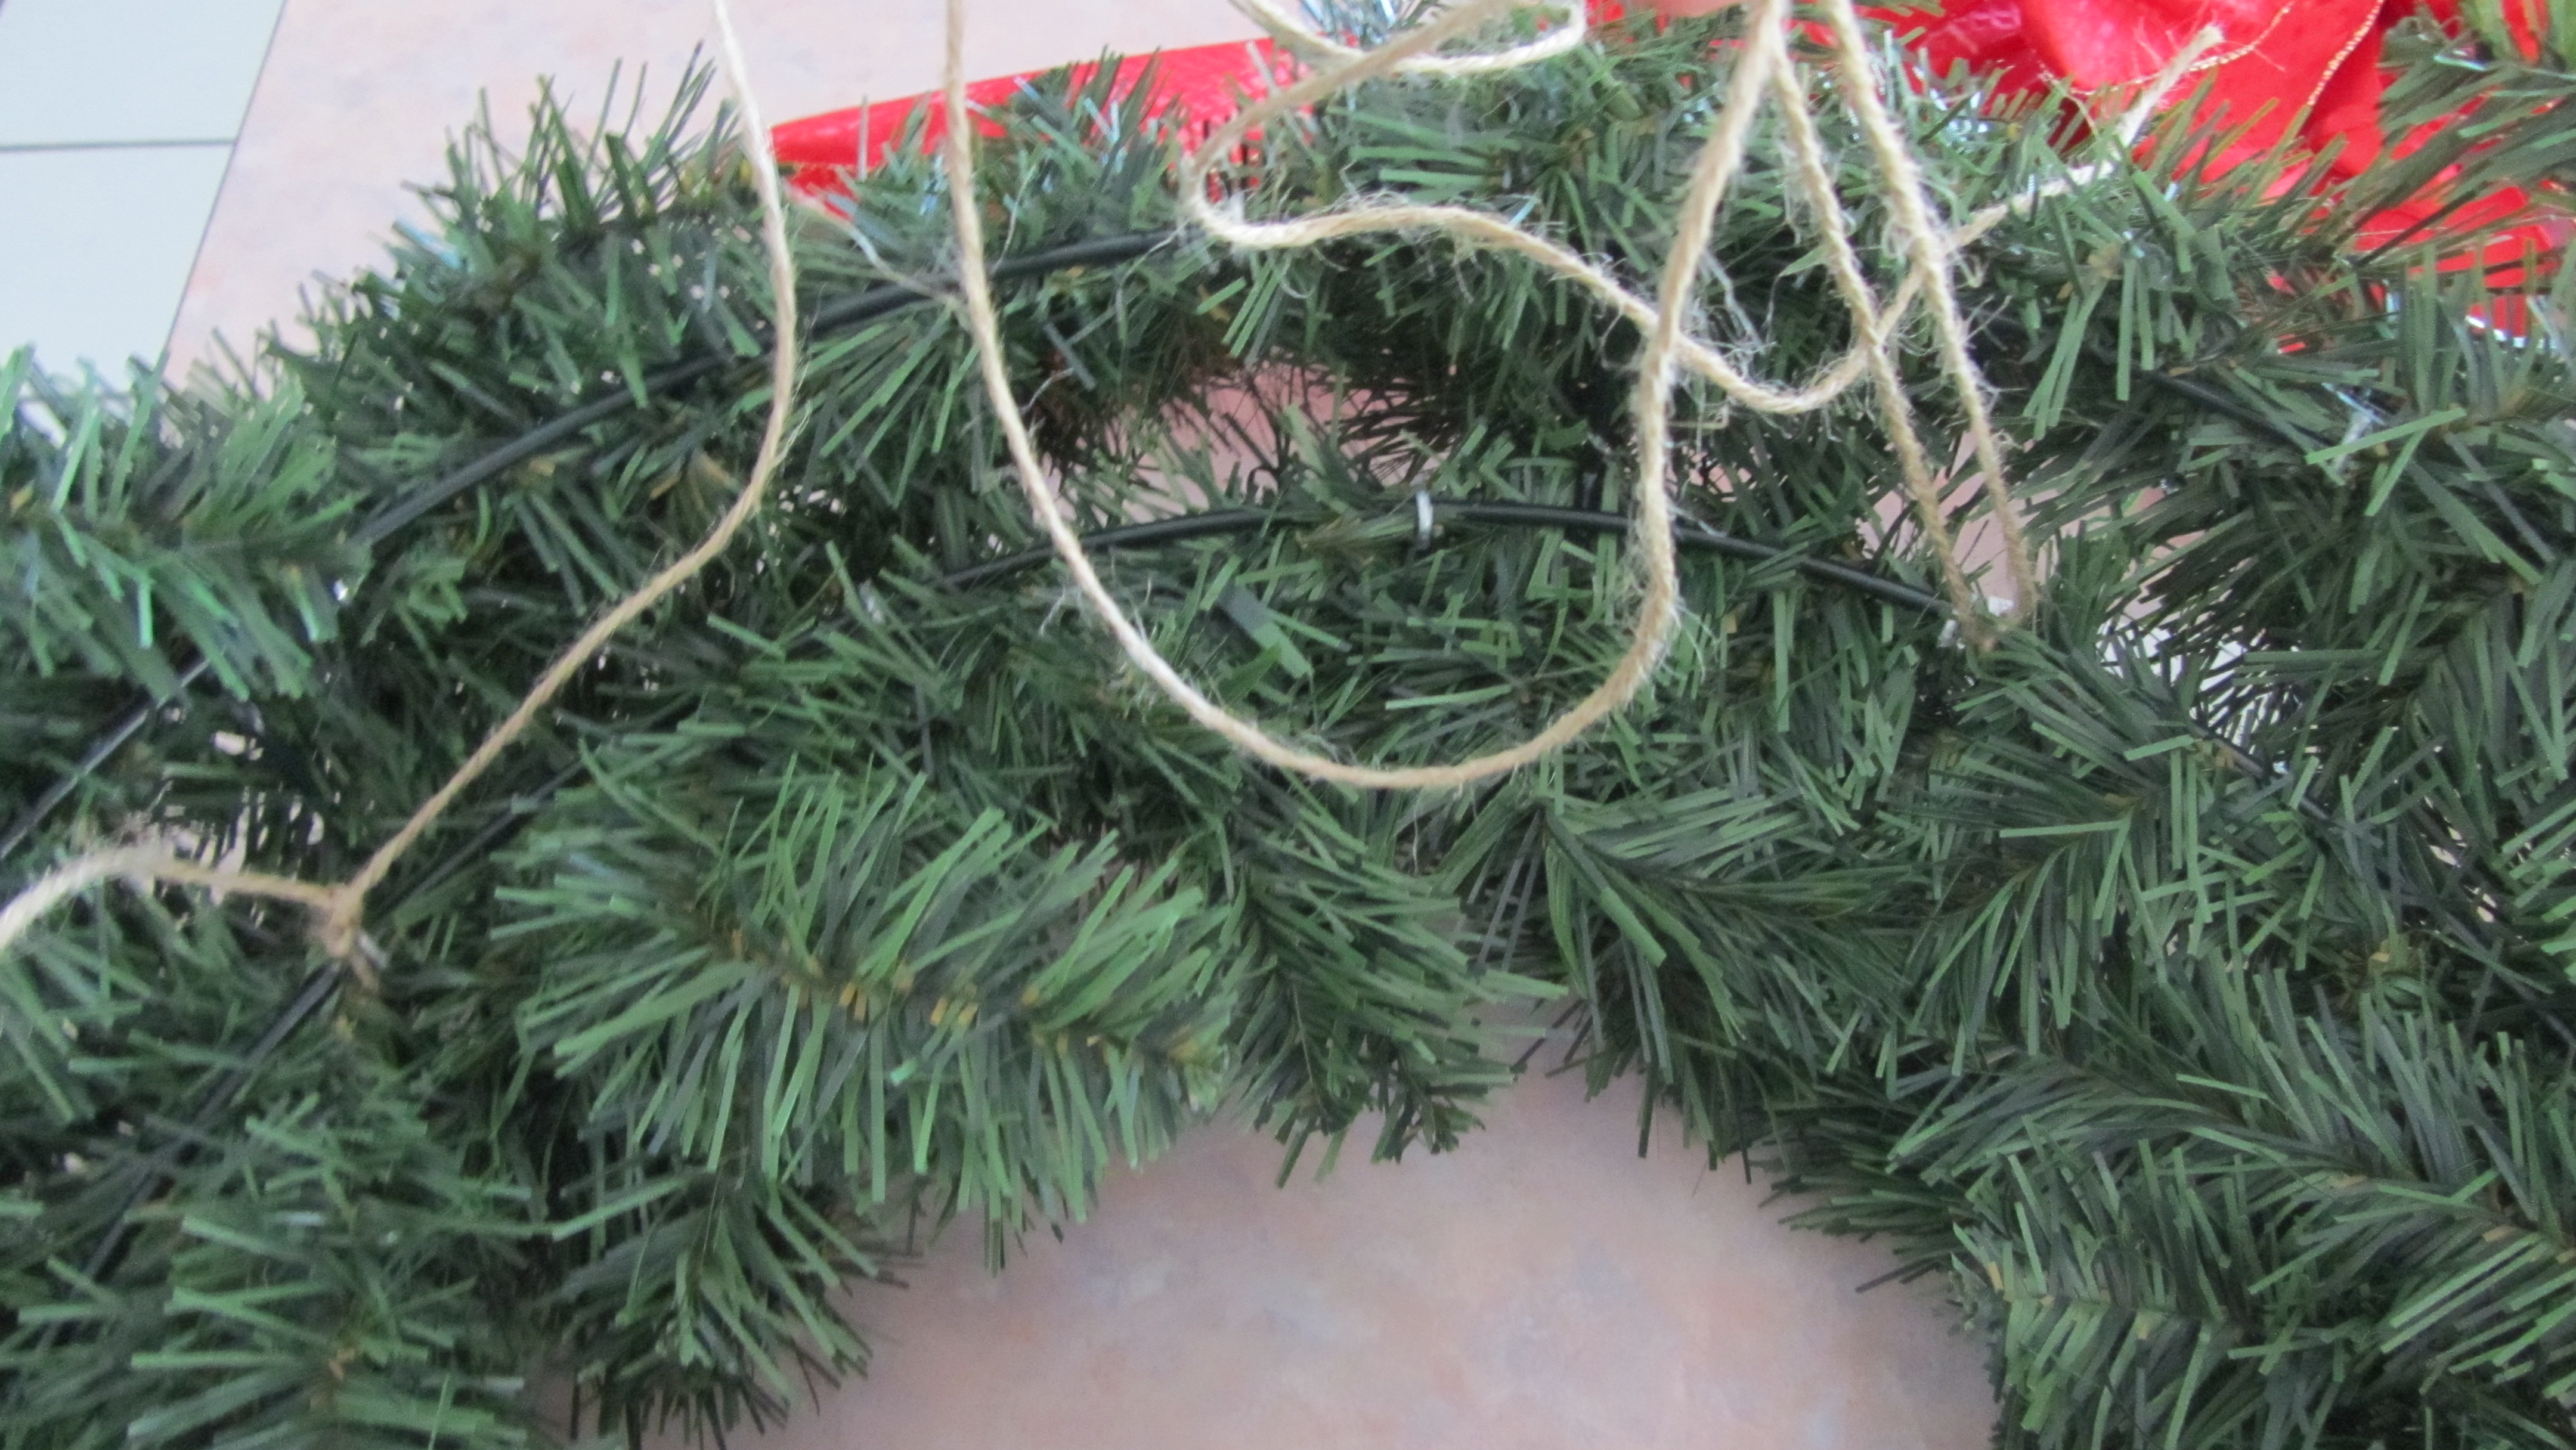
Step 1
2.) Next we chose a solid red ribbon with gold trim on the edges to create the bow that will hide the twine and hook on the door. We just made a basic bow with the ribbon and left the center knot loose so it could easily slip over the hook we have on the door. Measure the tails of the ribbon and tie to wire form in the same place you tied the twine. This way when the wreath is hanging the ribbon will hide the twine from sight.
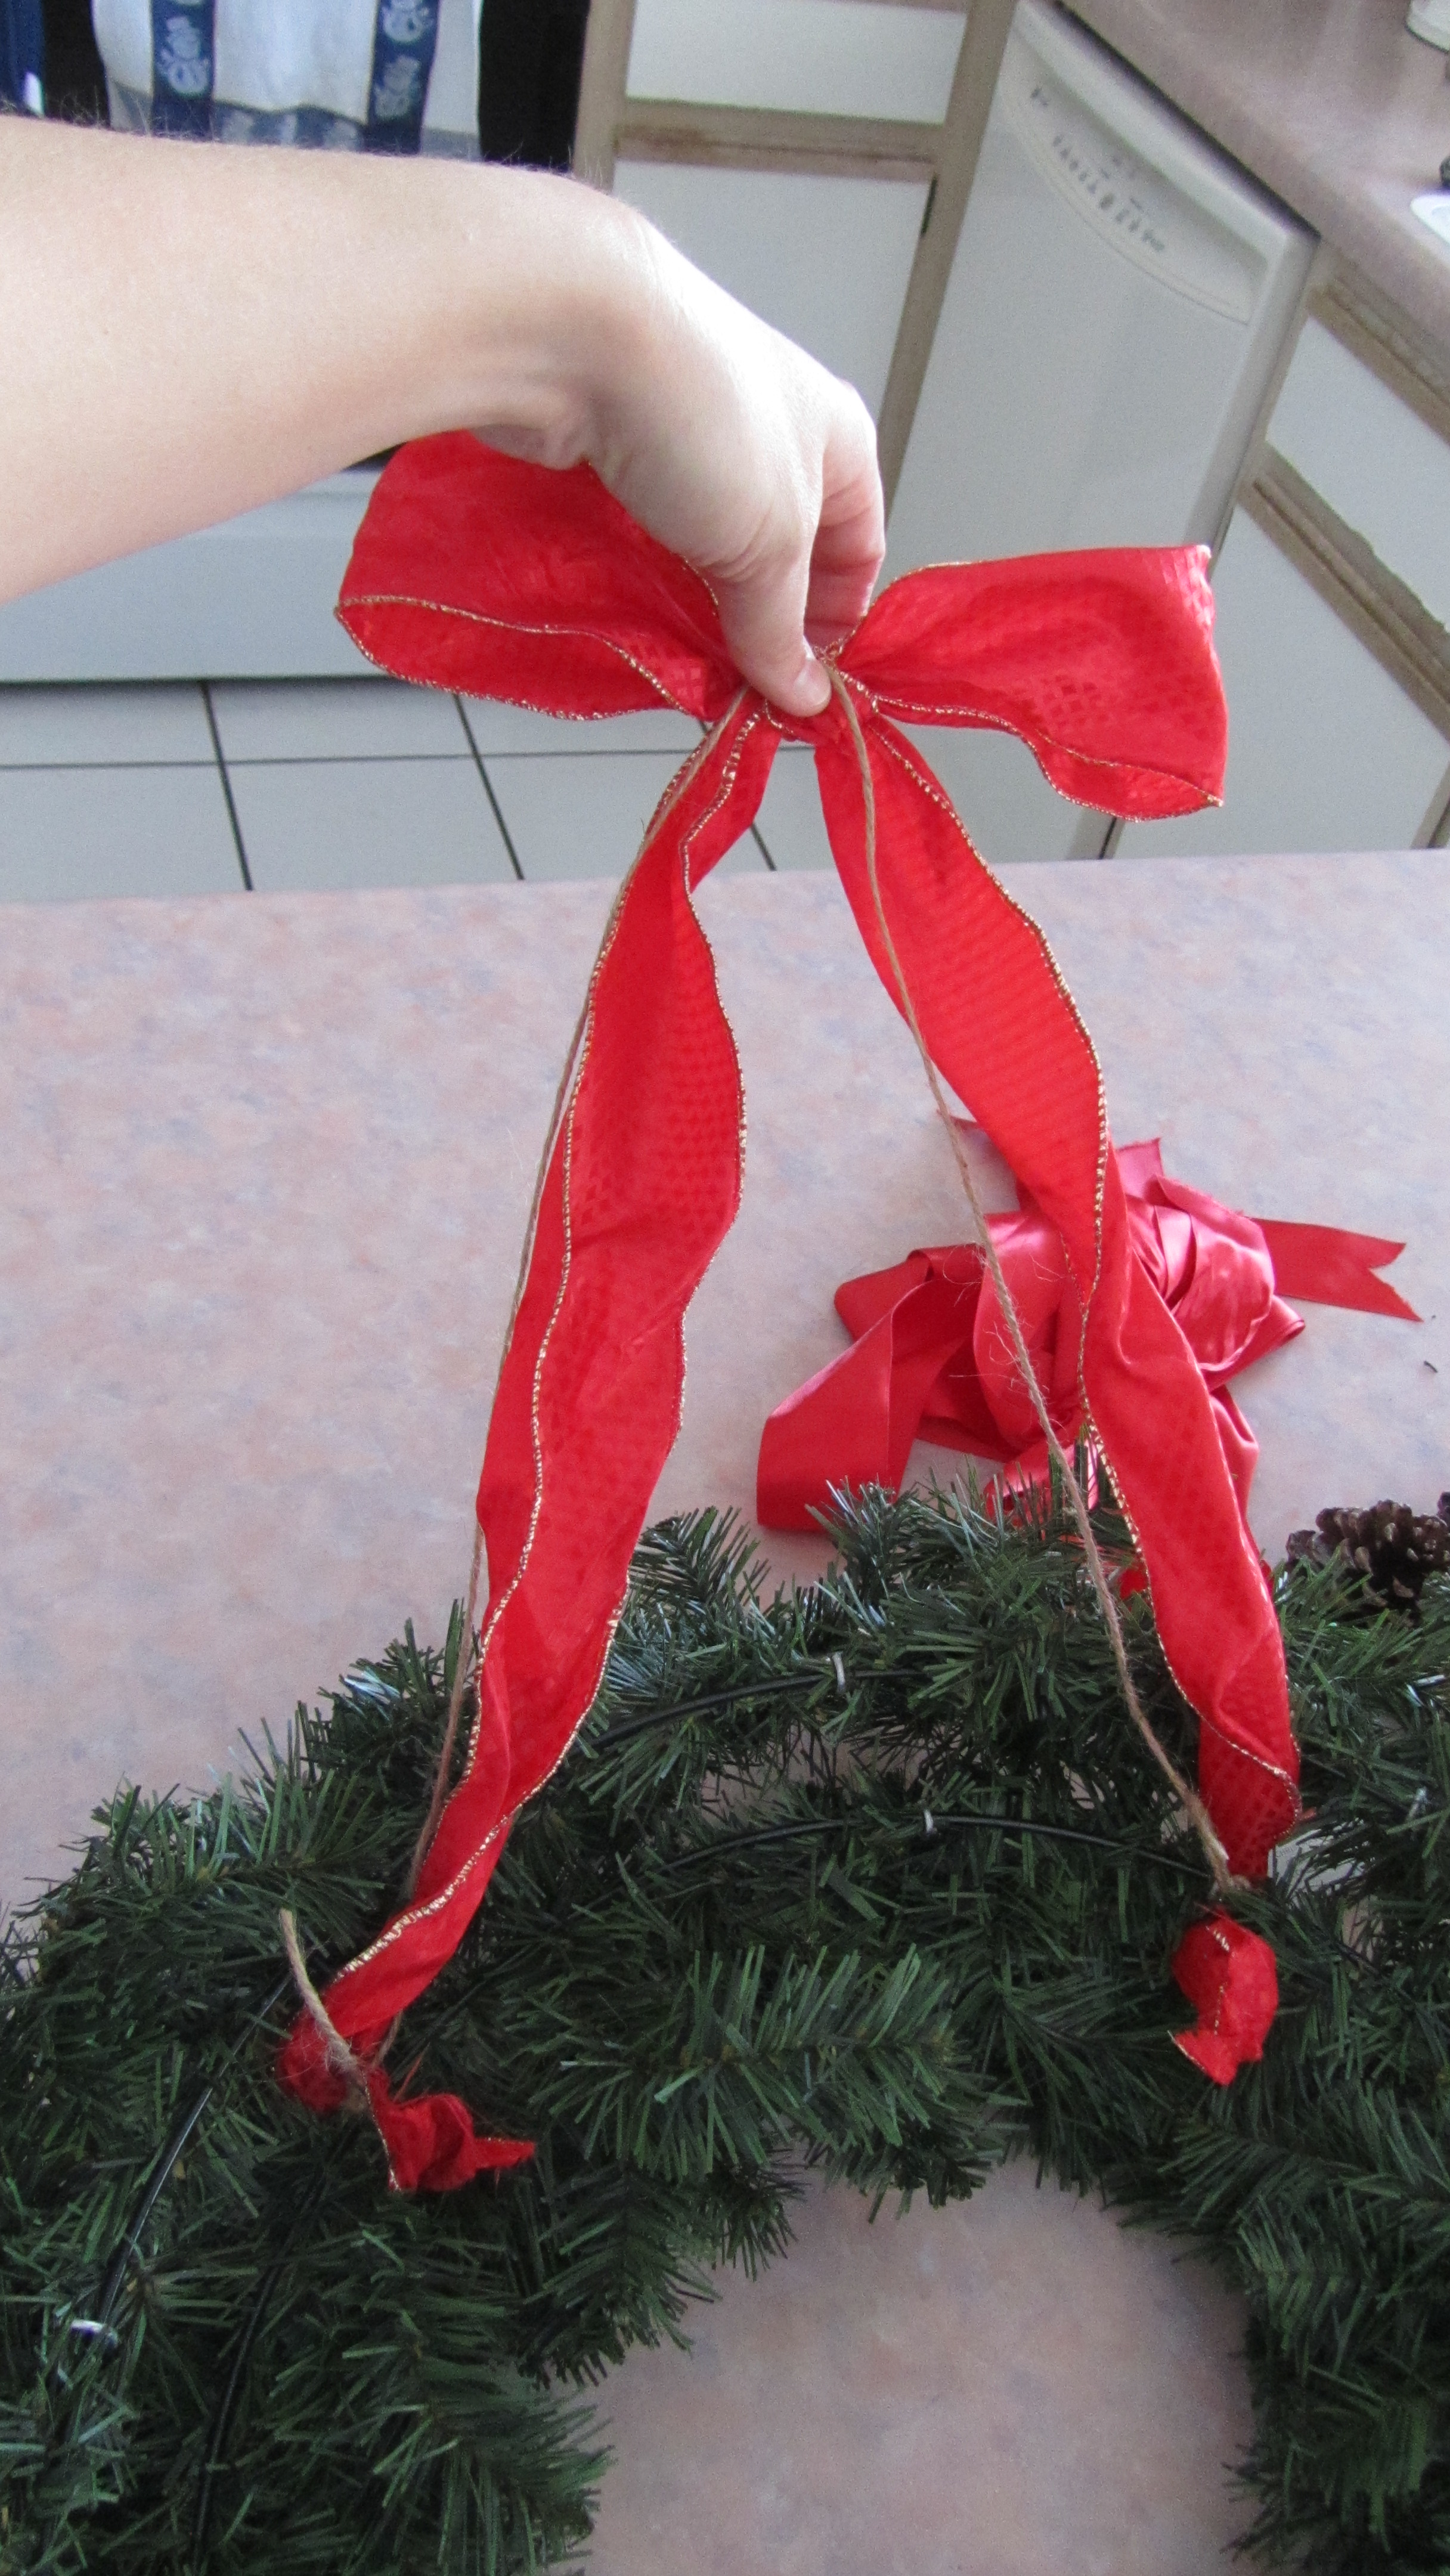
Step 2
3.) Your wreath should now hang like this. You will want to hang it up and test it to make sure all the lengths are right and you like the way it is hanging before you begin to add all the fun stuff.
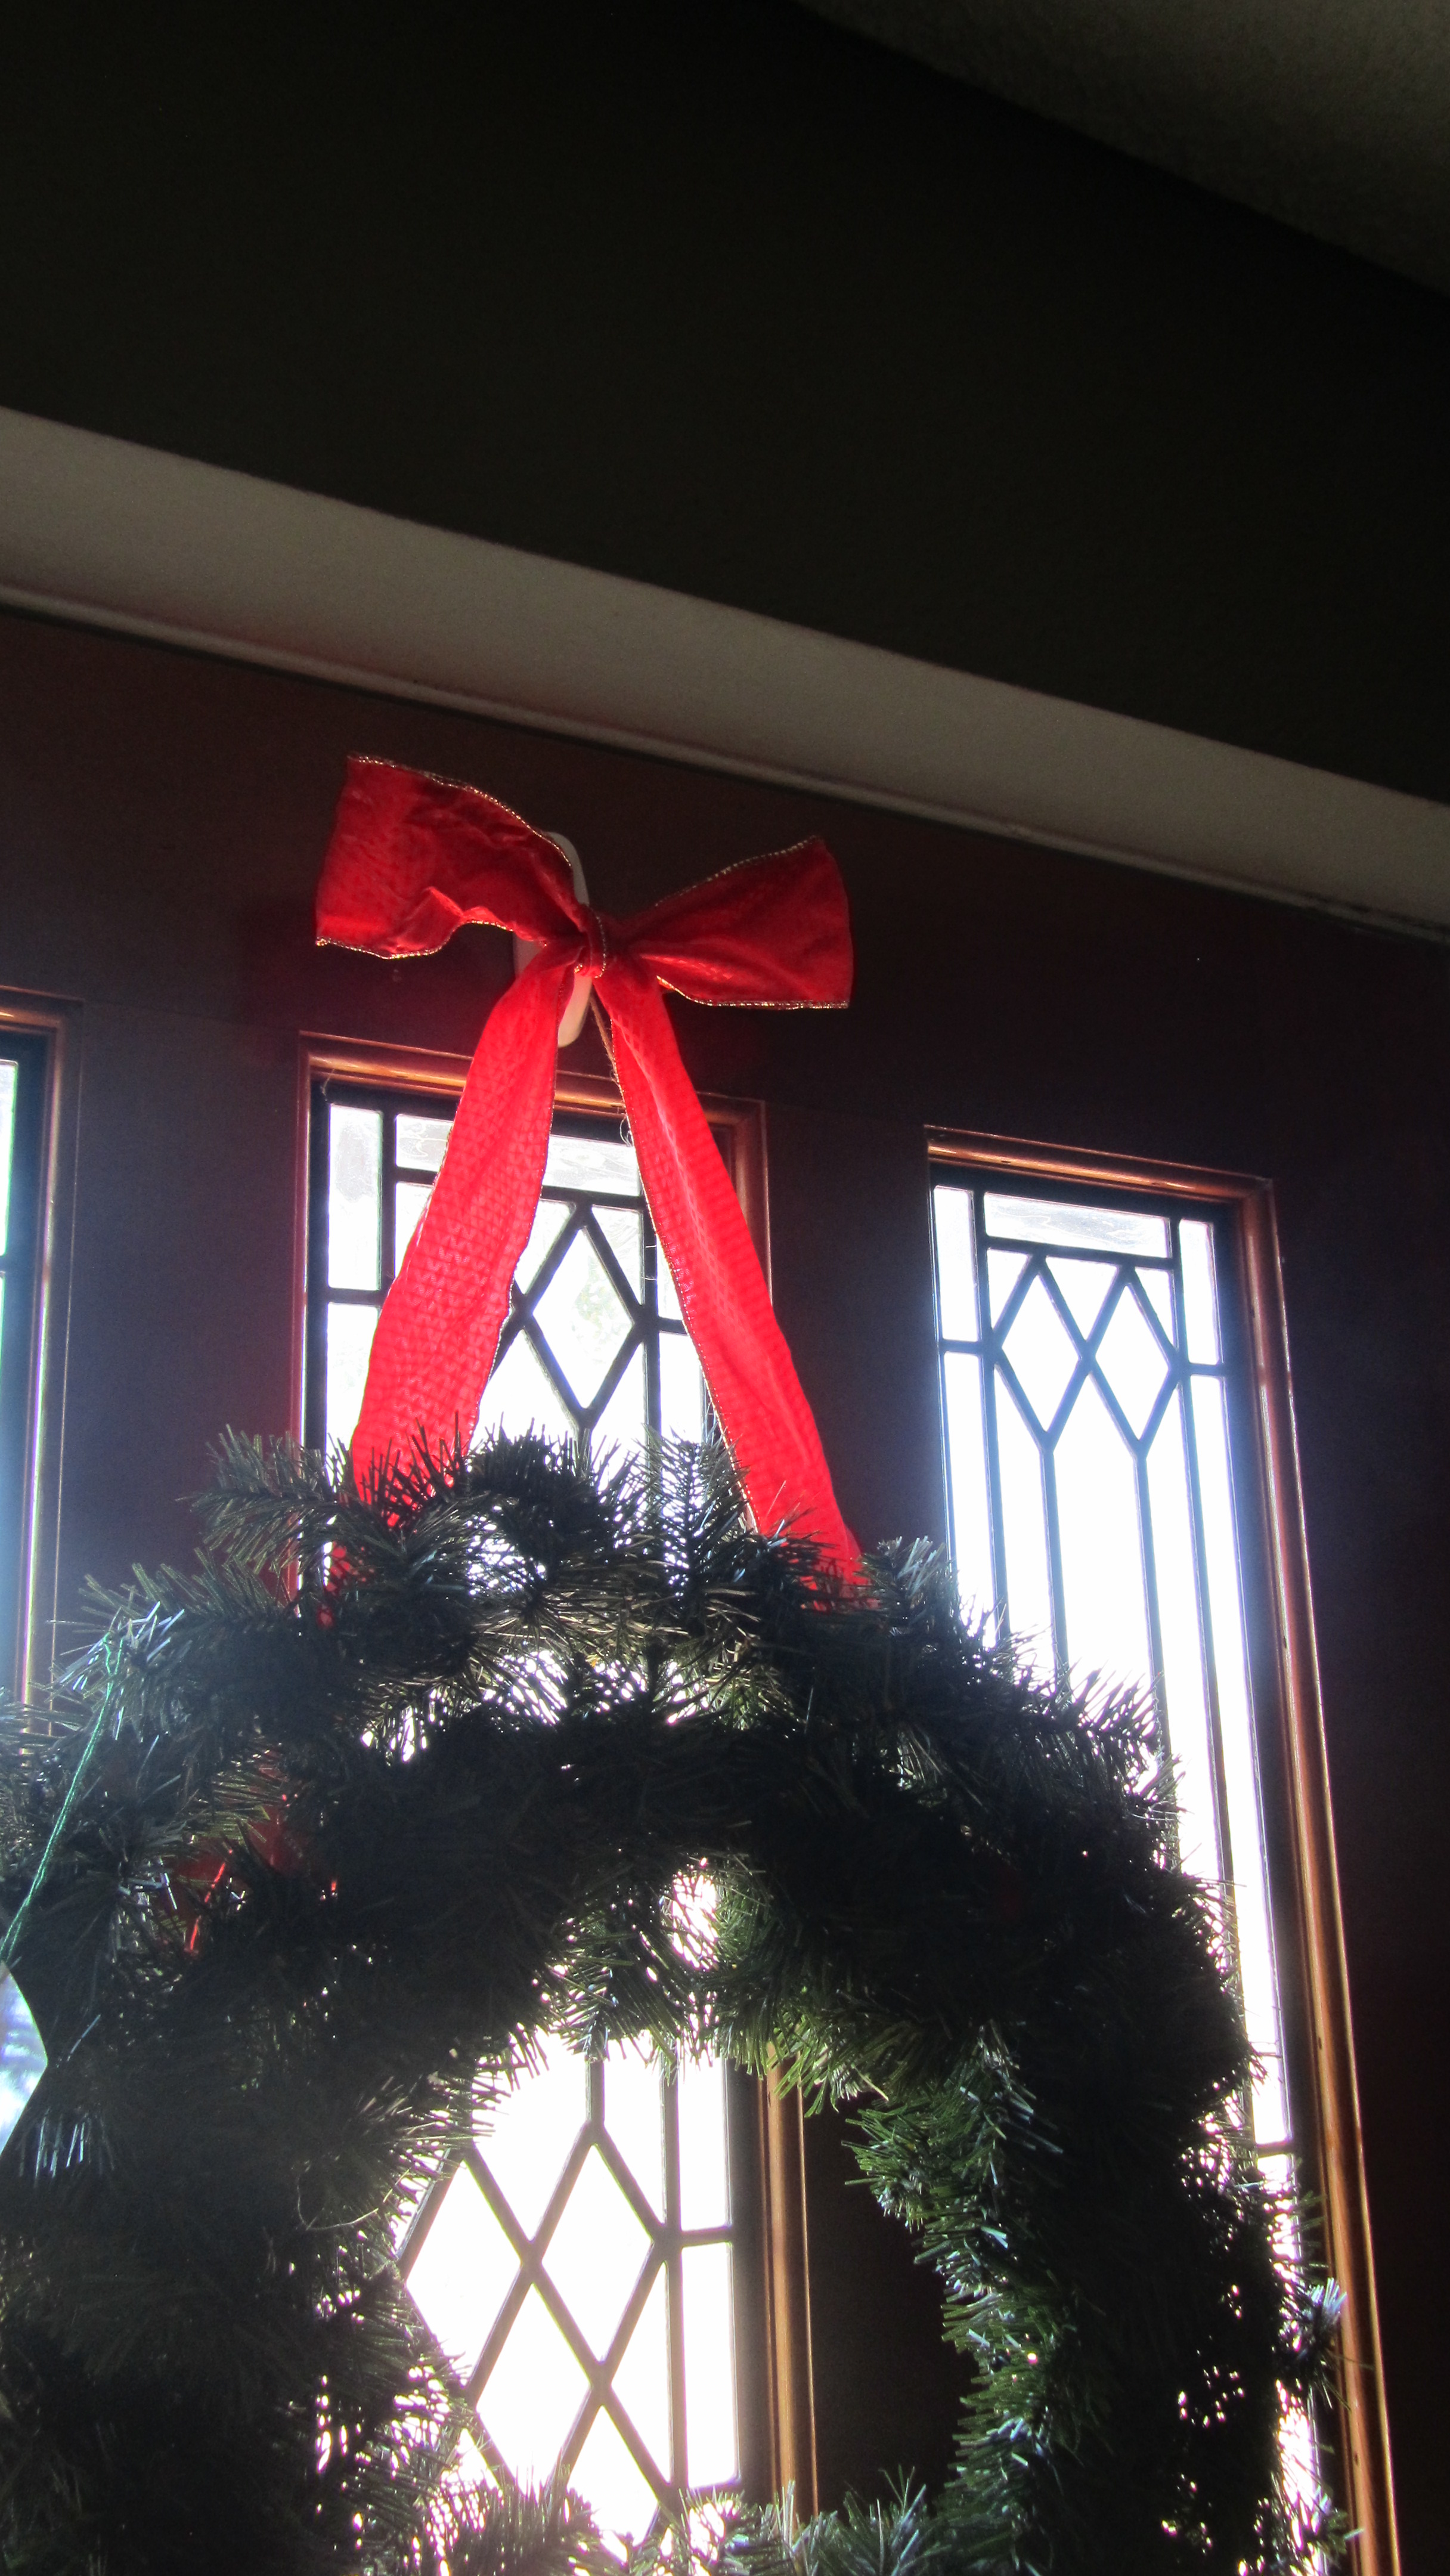
Step 3
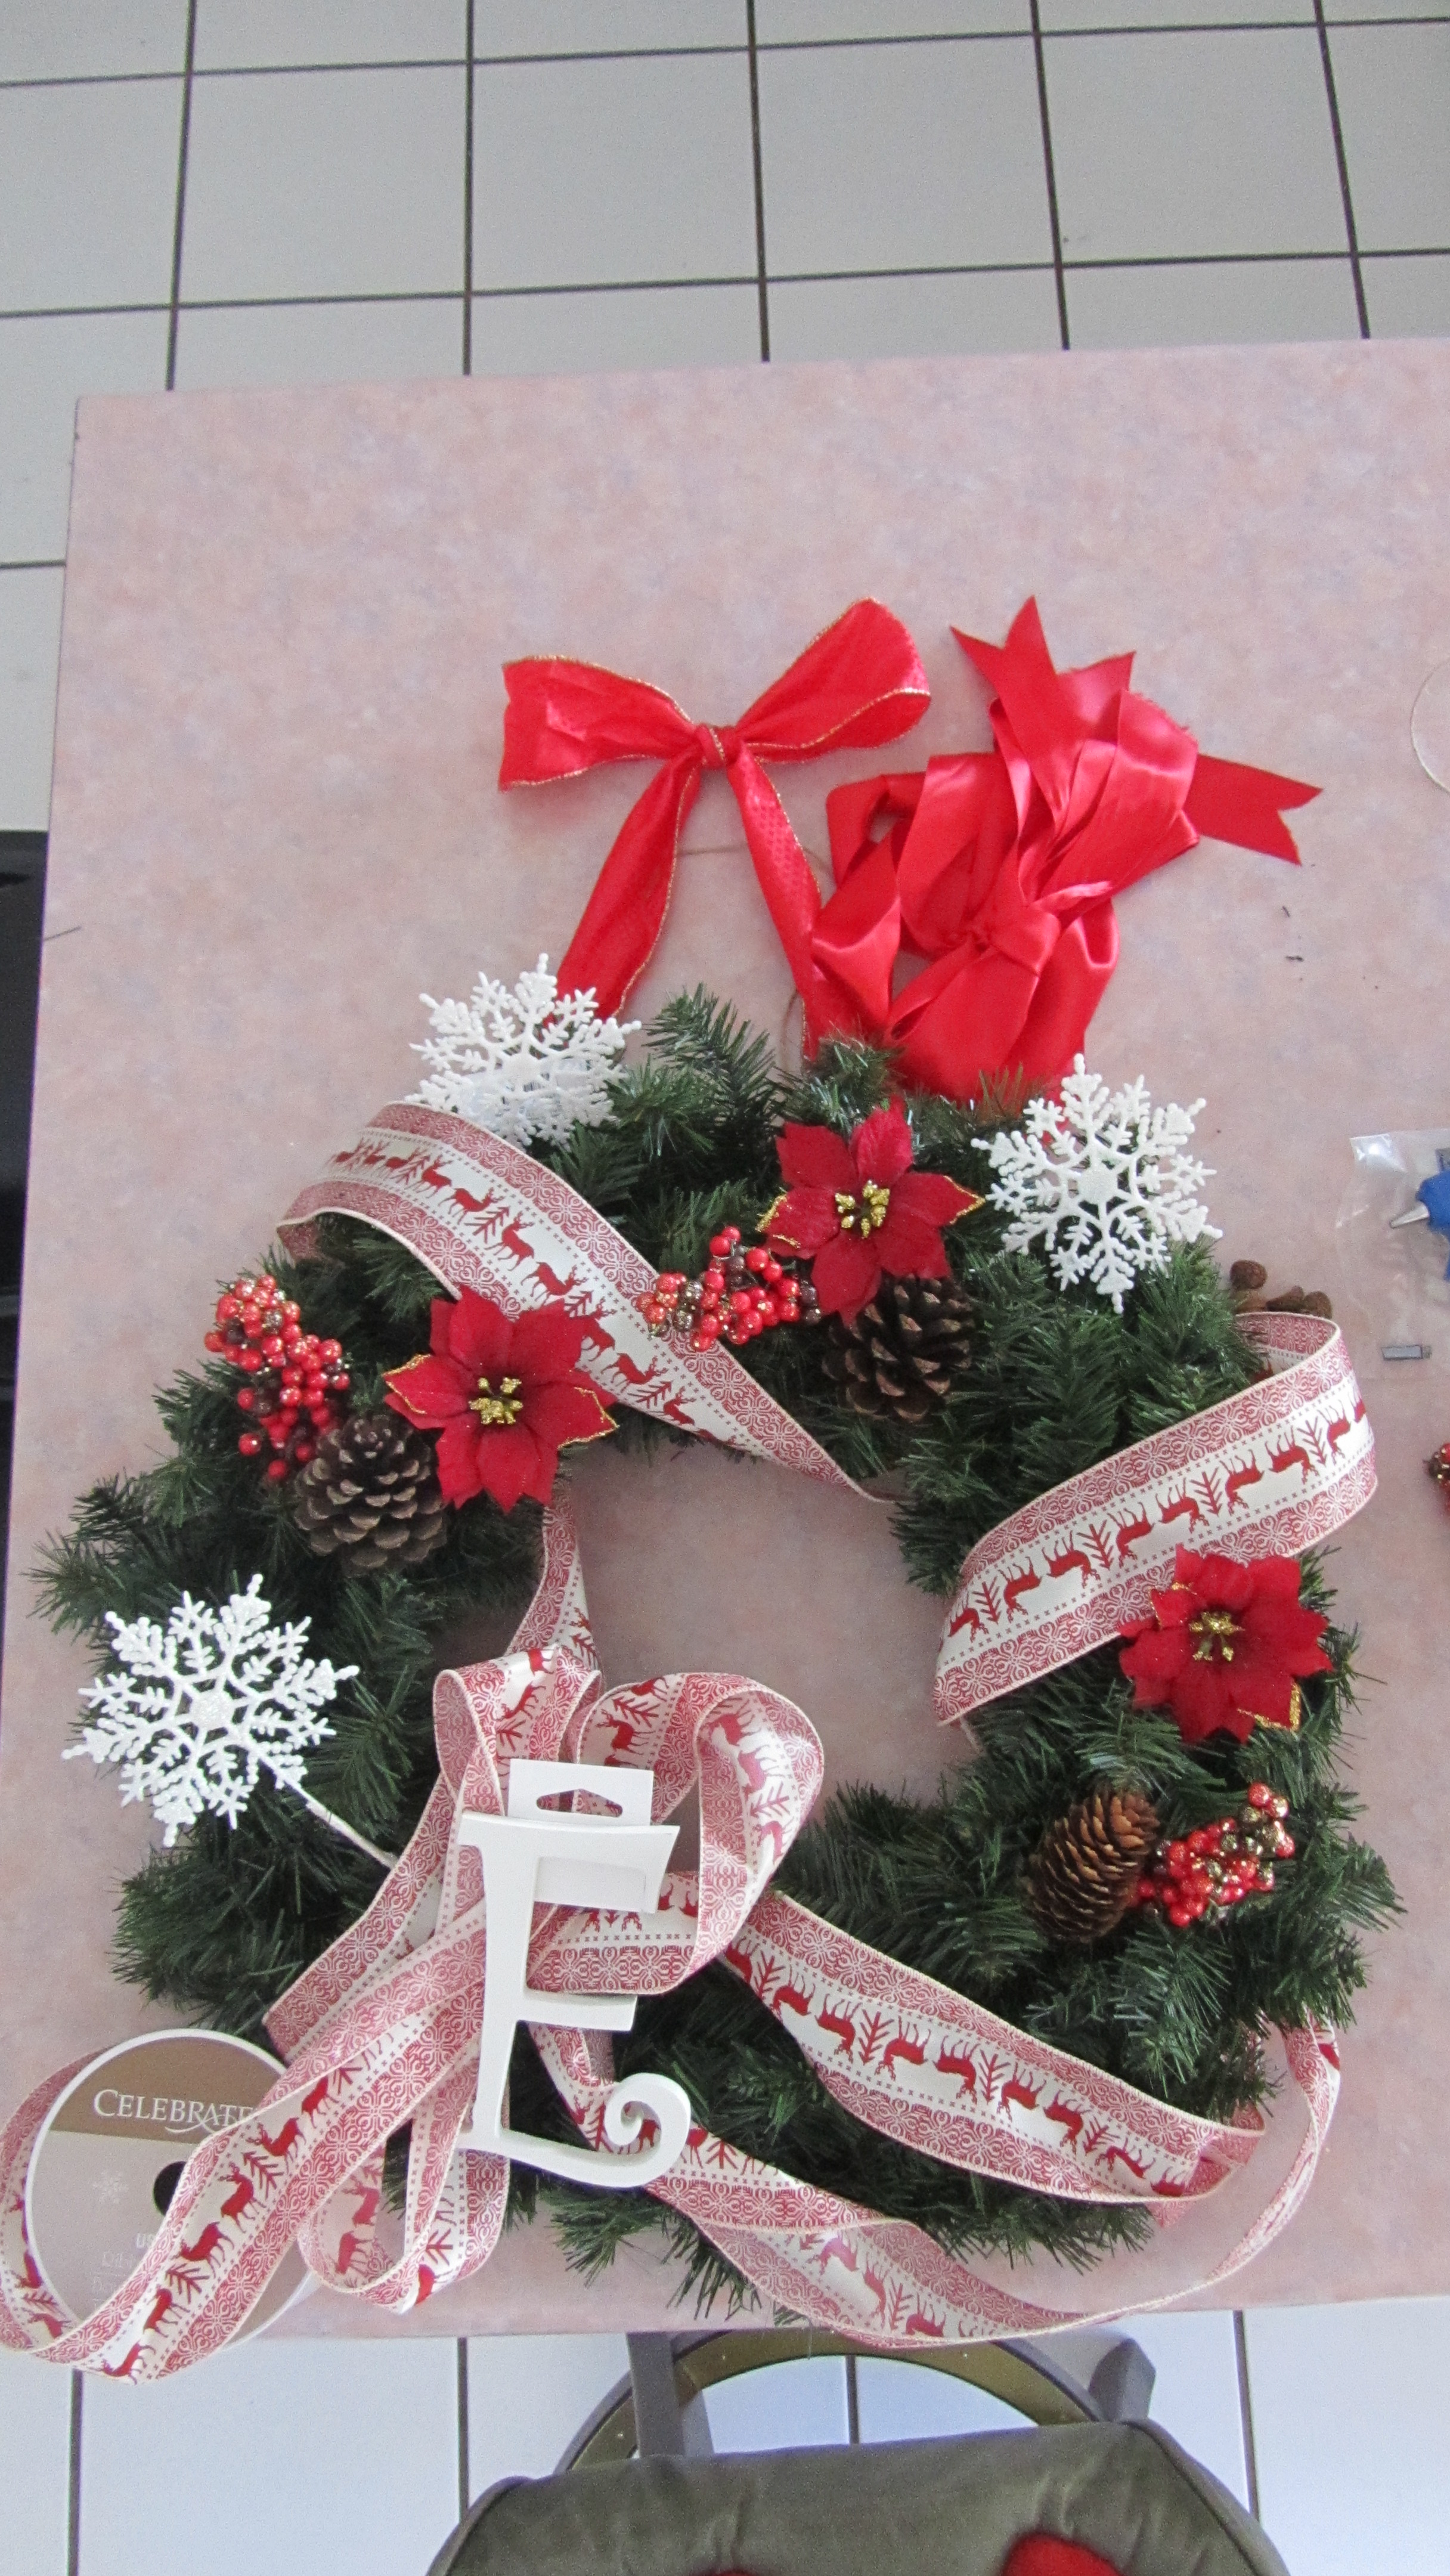
4.) Now you get to fluff the wreath just as you would a faux Christmas tree.
5.) Before permanently affixing everything you will want to do a rough layout of the items you have. We began by laying things on top of the wreath form to get an idea of how we wanted it all to all be positioned.
Step 5
6.) Now if there is anything that needs to be painted, spray painted, or glittered you will want to do that so it can dry while you construct everything else. Then it will be ready to add to the wreath at the end. For us this was the “E”. We took it out and spray painted it gold.
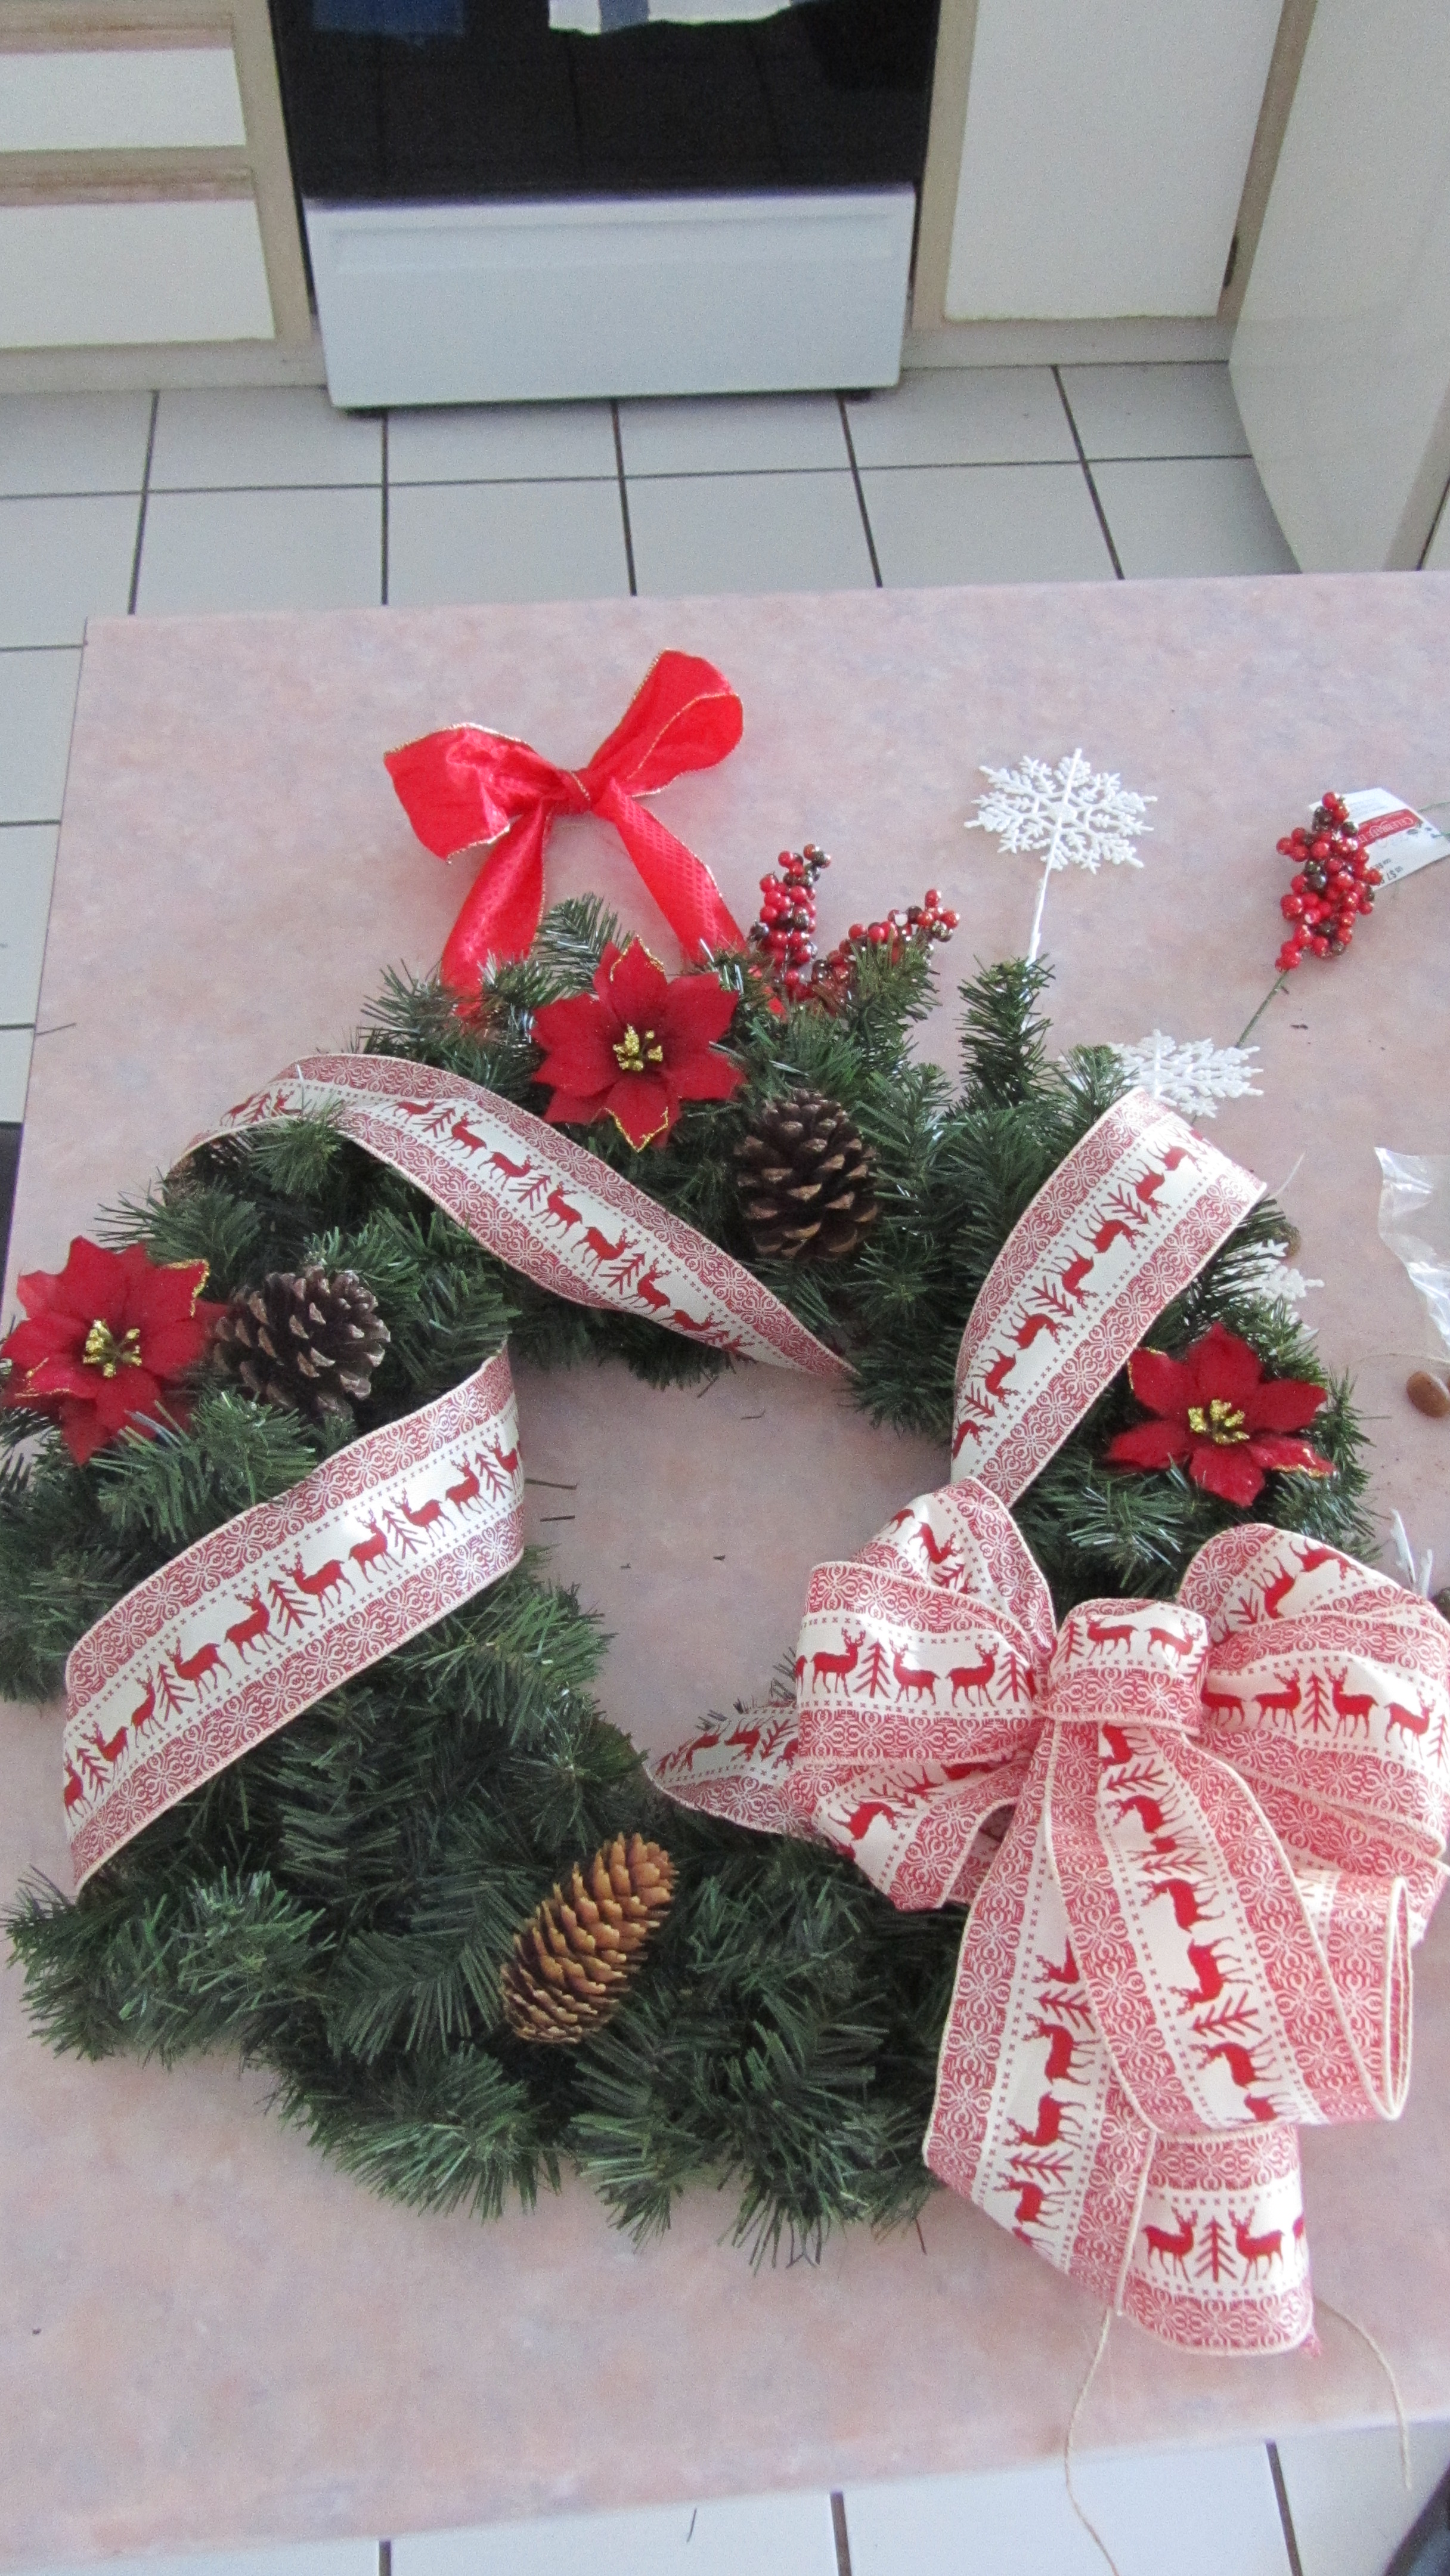
7.) The next thing we did was decide how we wanted the bow to look. We used a different ribbon than the first one for the hanging element. There are so many different types of bows you can make. We first Googled how to make a bow for some ideas. After looking at a couple options I decided to wing it and ended up with the bow you see in the picture. After having the bow complete it ended up looking better on the right side of the wreath (we had it on the left originally).
8.) Lay the bow aside and wrap the ribbon around the entire wreath form a few times. We started on the bottom back behind where the bow is going and tied one end of the ribbon to the back of the form. Next we began wrapping it loosely around the wreath. Once you are finished secure the other end to the back of the wire frame by tying in a knot.
9.) Now secure the bow. We ran more twine through the back of the bow to tie it to the form as well. The twine is hidden behind the middle knot.
10.) Next we began adding the embellishments. We started by laying out where we wanted the pinecones (we gathered ours from the cabin we spent Thanksgiving at). We used the glue gun to glue these to the wreath. Next we added the poinsettias. These were purchased and already had floral wire attached to the back so we twisted the wire around the branches we were securing them to.
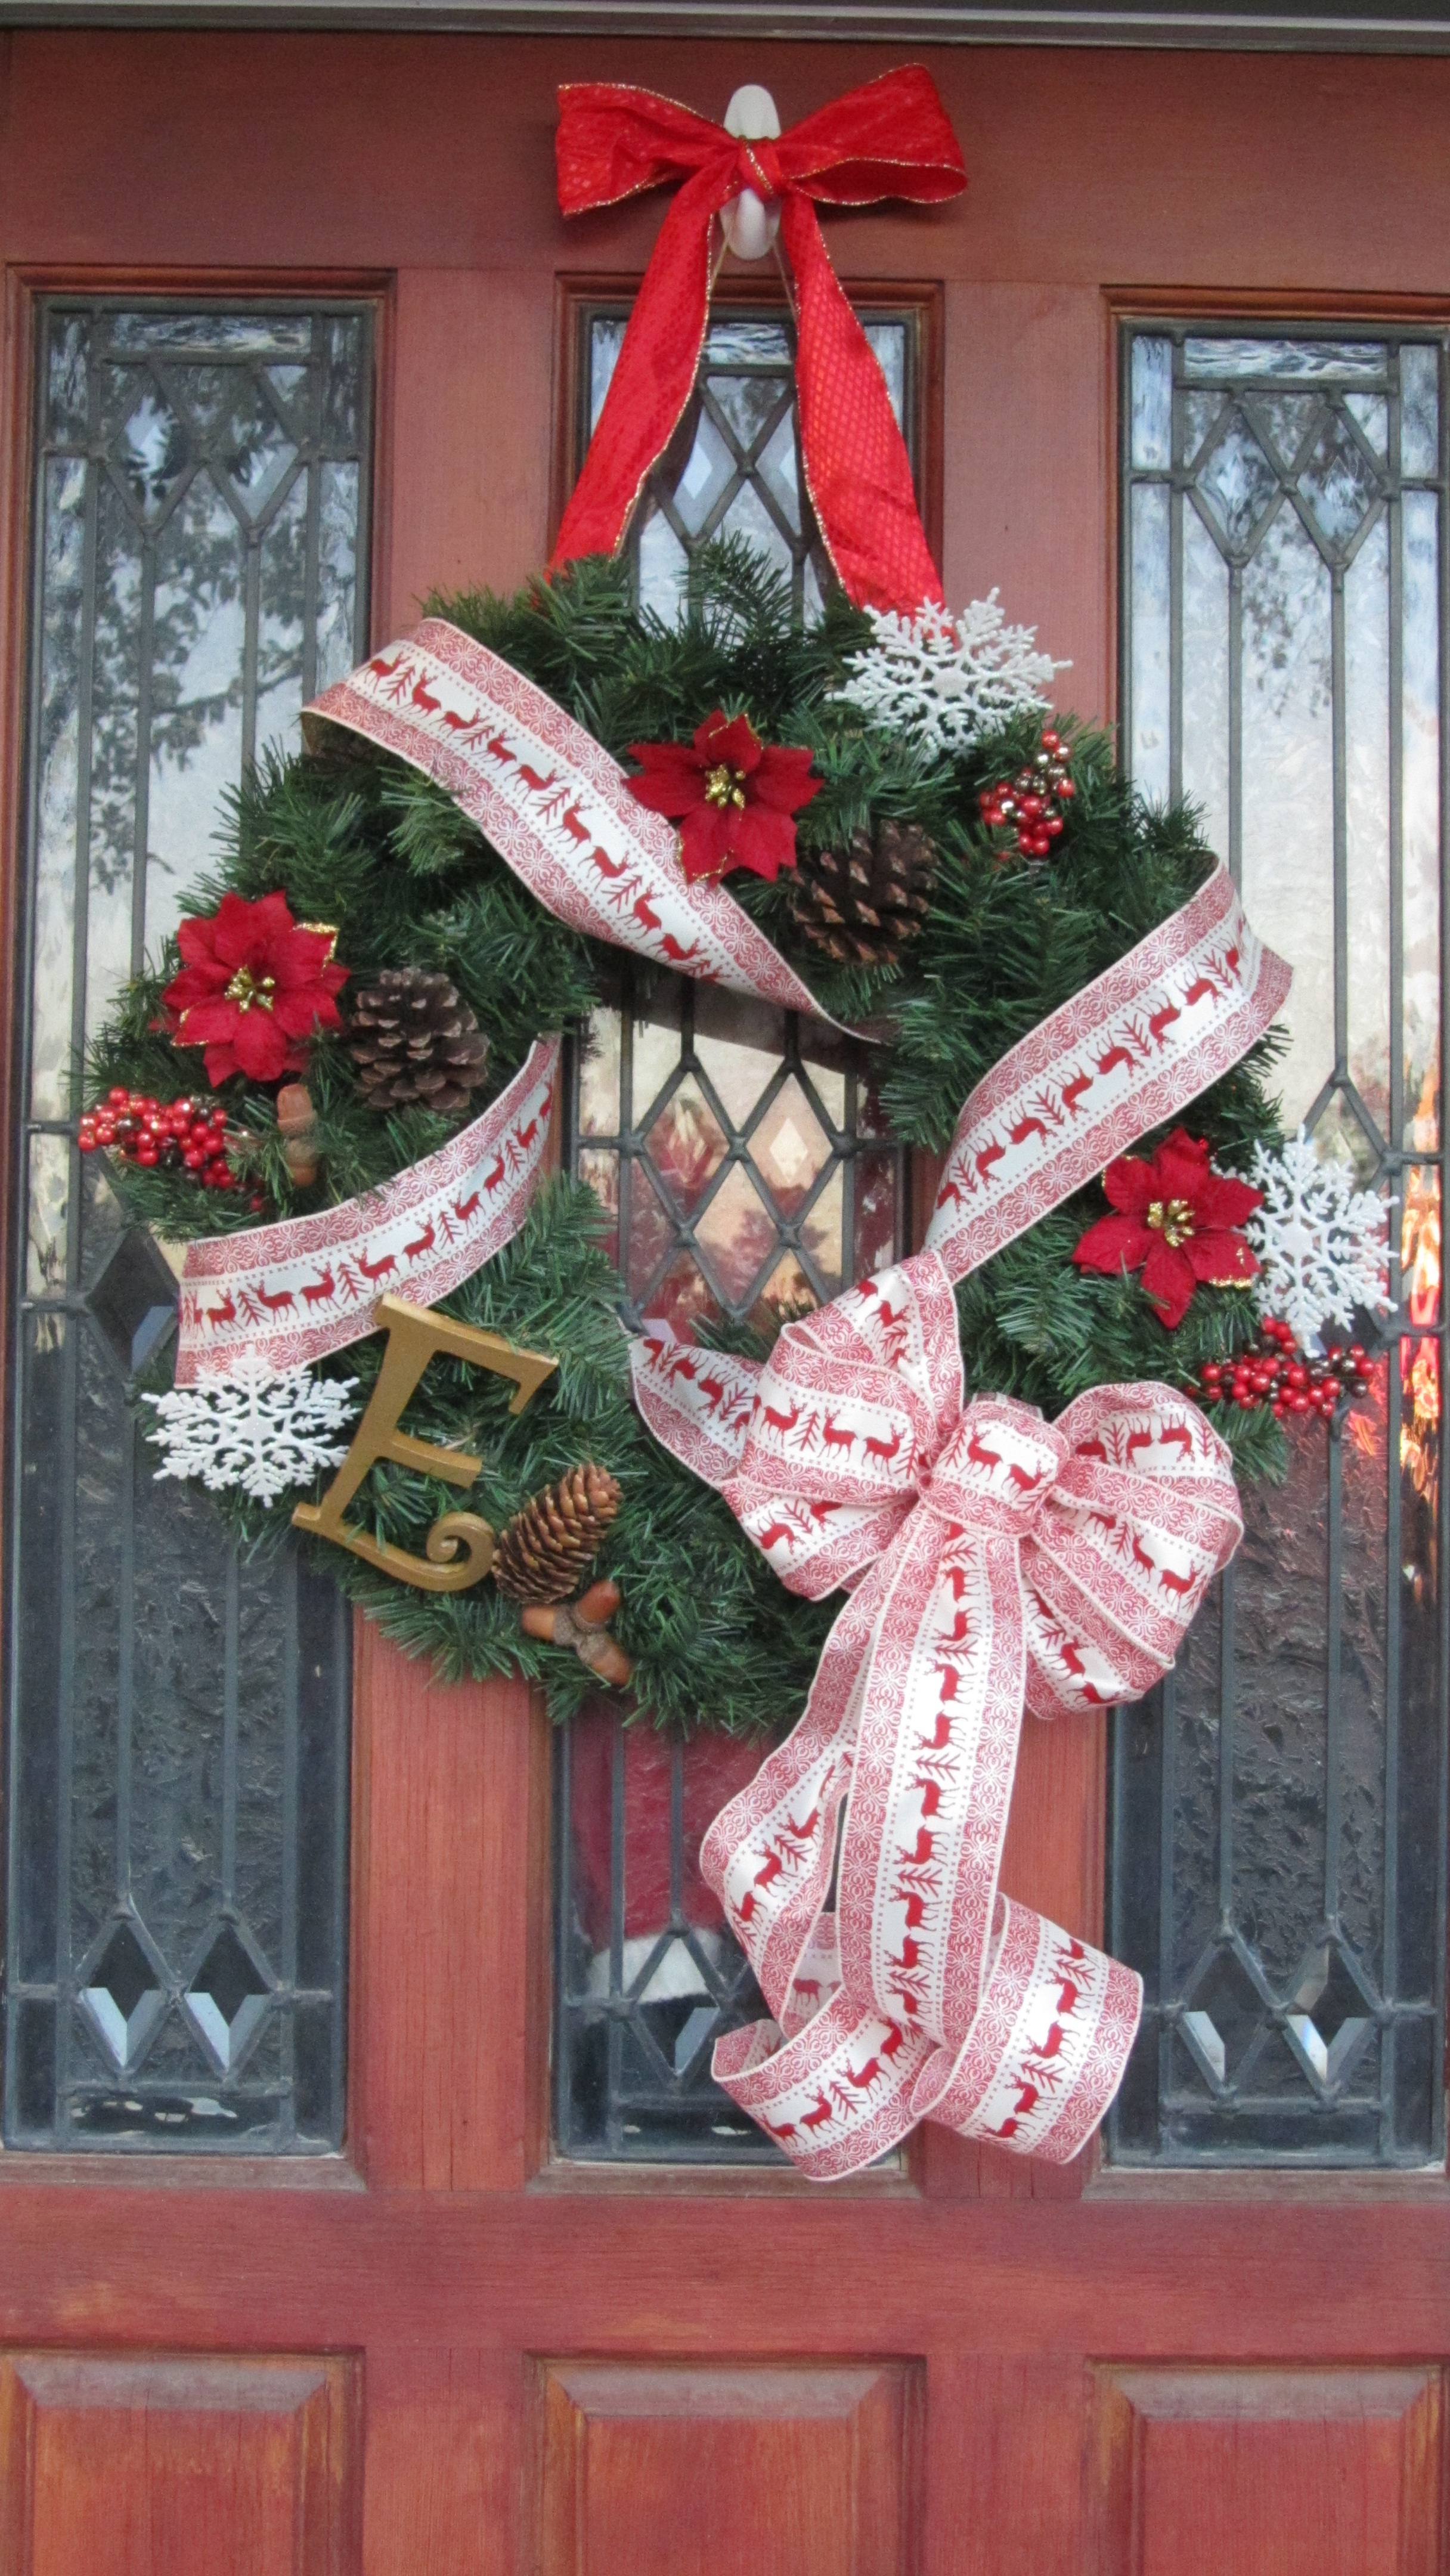
11.) This is how the wreath should now look.
Step 11
12.) Next we added the berry sprigs and secured those with hot glue. Then the snowflakes which had wire attached. Lastly we added the golden “E”. We stapled some twine to the back center and tied it to the wreath form. For added support we also used the glue gun to secure it to the branches.
13.) Do any last minute fluffing of the wreath in the open spots and fluff the bow one more time. Clip any hanging twine or ribbon to the lengths needed to hide the twine and ribbon knots on the back and the wreath is finished. Only one more step to go.
14.) Hang the wreath on the front door for all to enjoy! Happy Holidays!
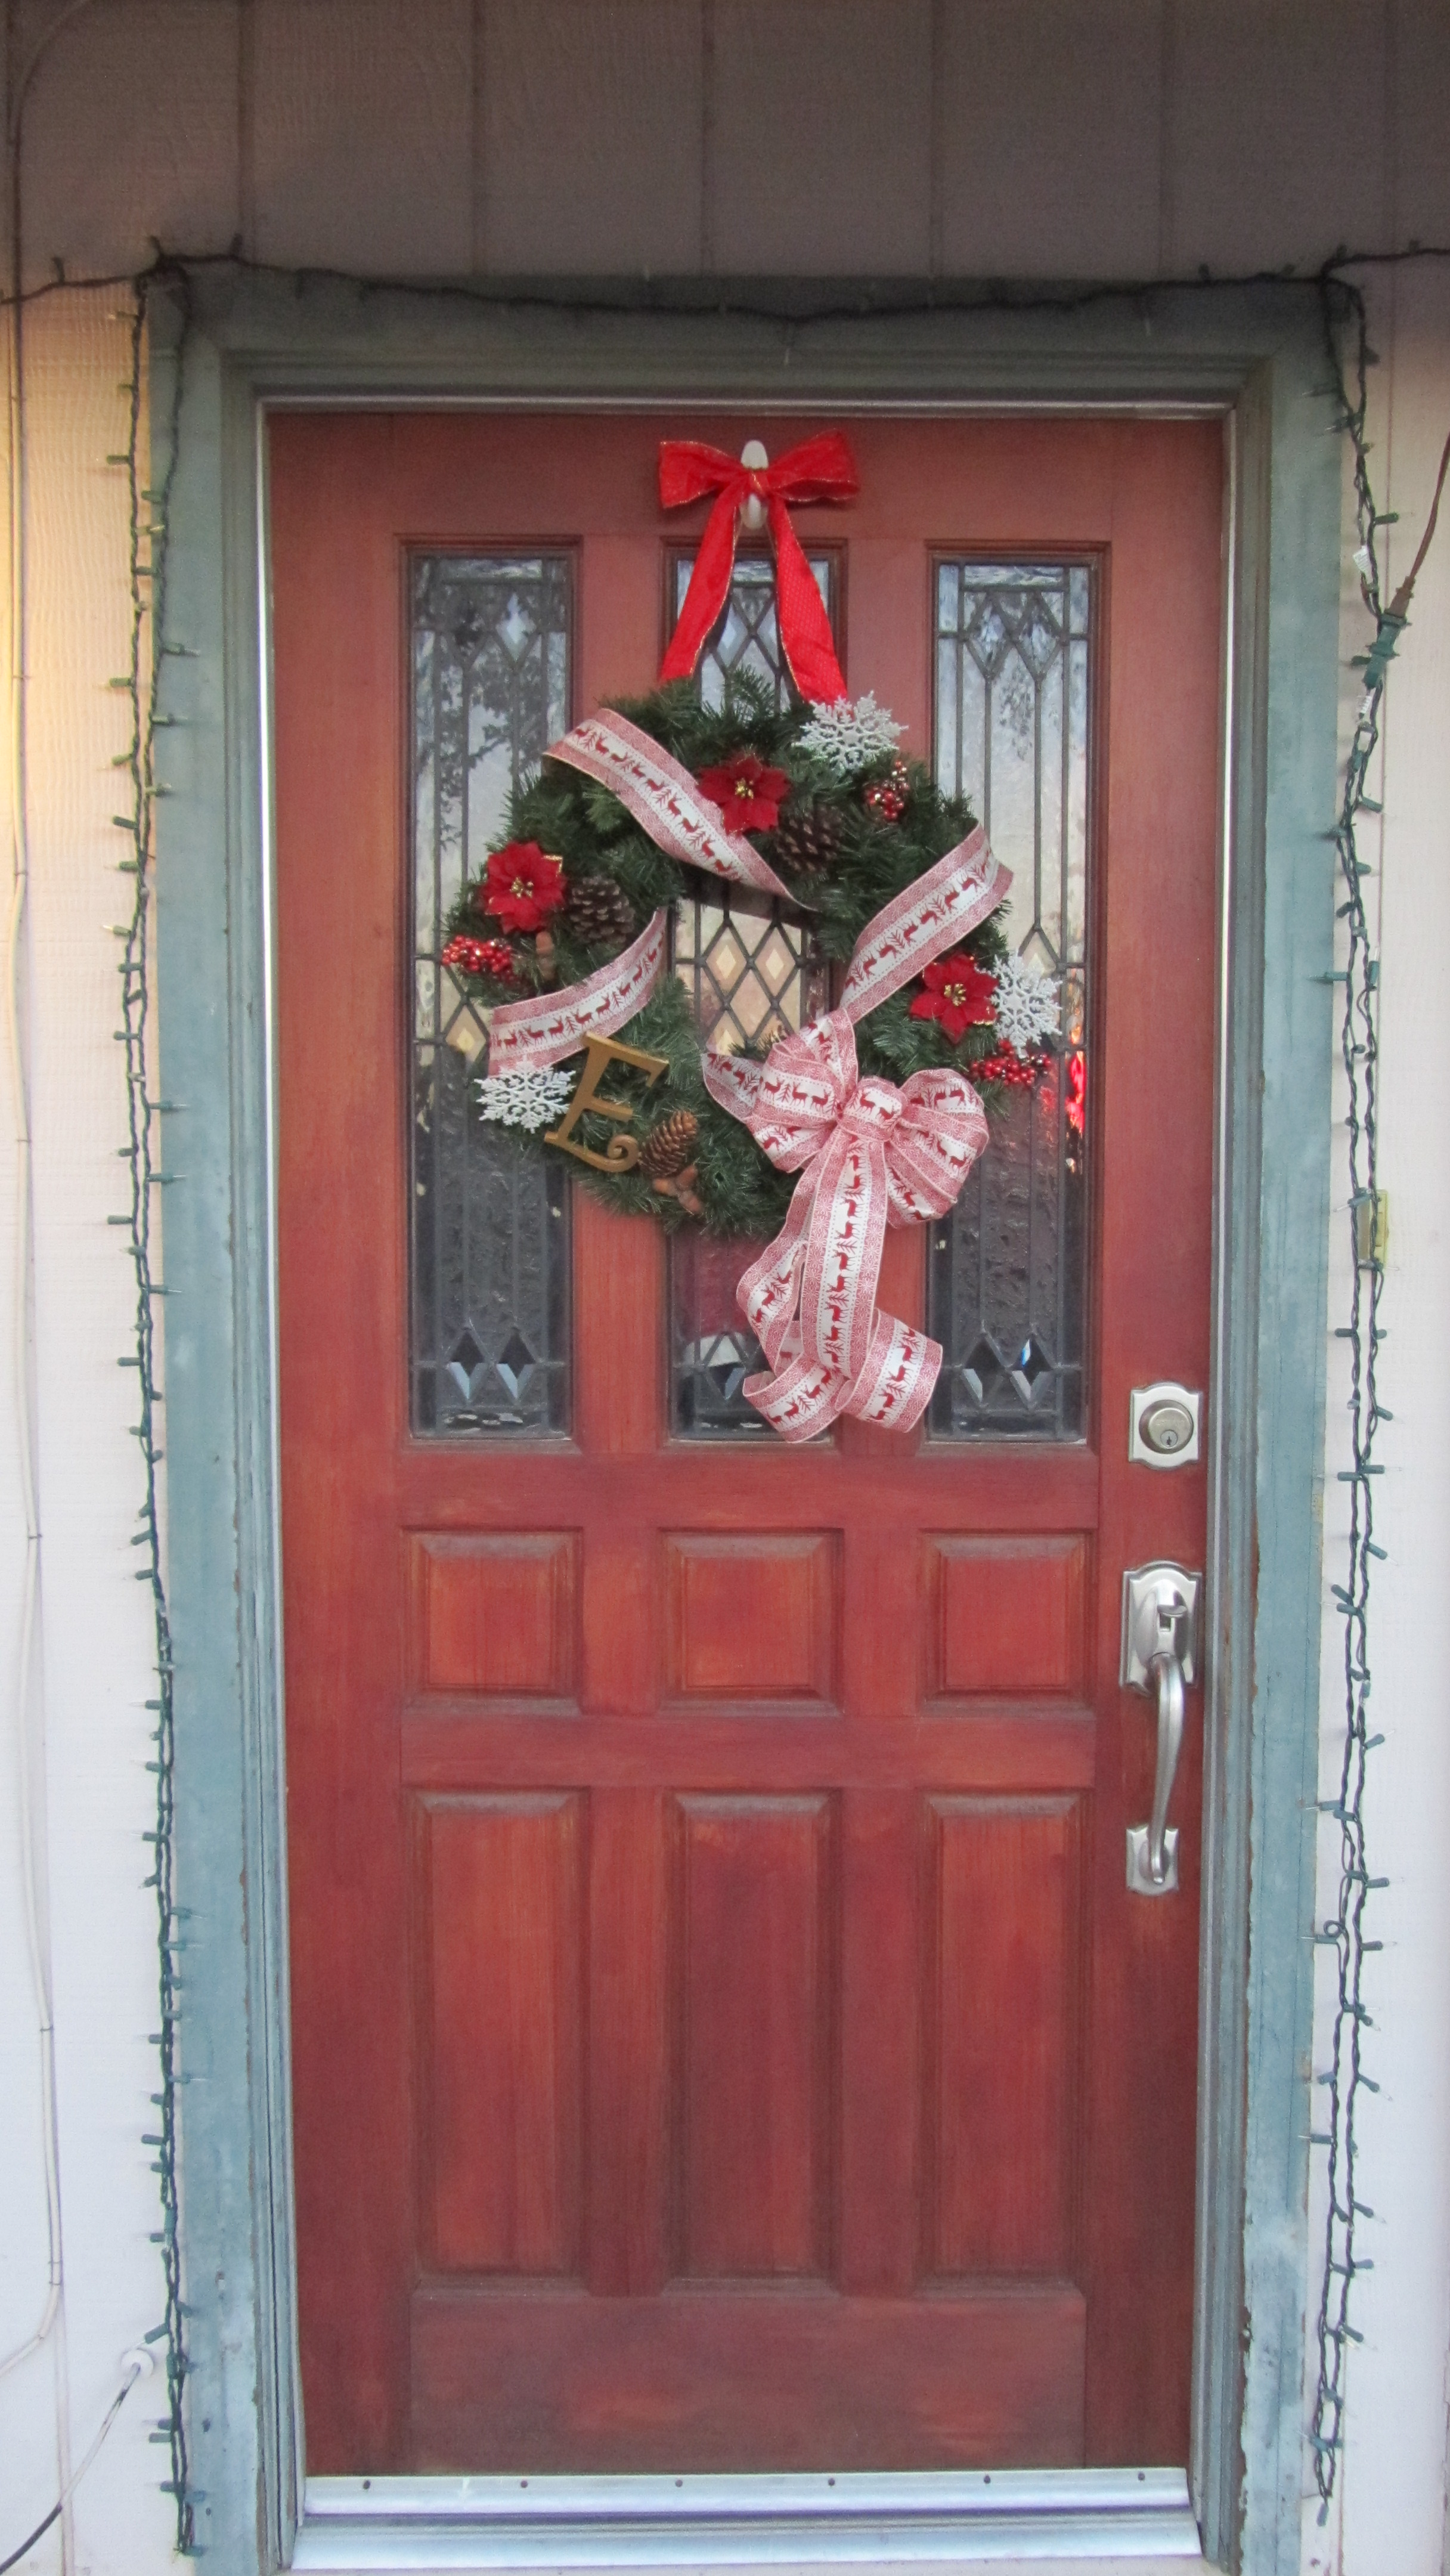
Step 12 – Hang the wreath on the front door for all to enjoy!

[…] making this wreath was so much fun that you would like to make another, check out our Christmas wreath DIY from last […]