It’s about that time to break out the carving tools, the paint, the glue, whatever you can imagine to create fantastic eye-catching pumpkins just in time for Halloween. Whether you want to go the no carve pumpkin route, the template carving route, or are an expert pumpkin carver we have some ideas for you. Read on to see some of our favorite ideas for decorating and carving your pumpkins this year!
1.) Cover your pumpkin in bat cutouts. This could easily be done with craft paper or black foam and a little bit of glue. A great no-carve way to decorate your pumpkin.
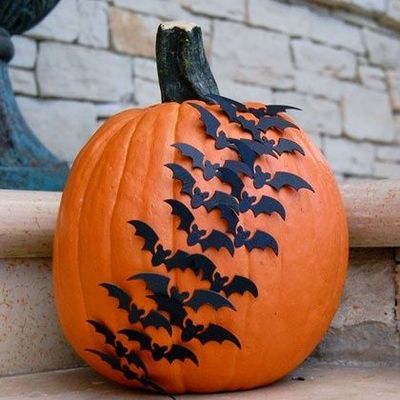
(image via)
2.) Another no-carve option would be to paint your pumpkin. You could paint a standard Jack-O-Lantern face or start to get creative with different objects and patterns. We love these argyle pumpkins.

(image via)
3.) Another no-carve option is to use stickers or decoupage cutouts on the pumpkins.
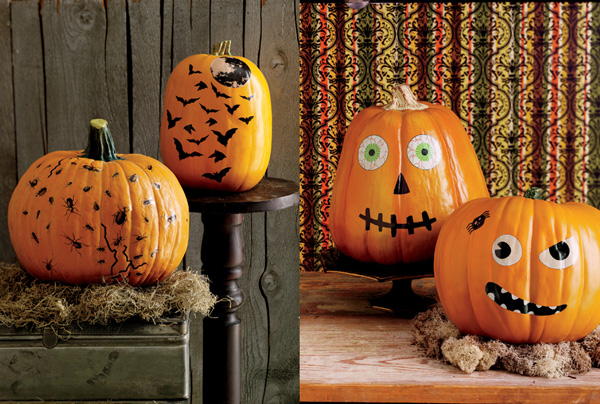
(image via)
4.) If you have some old stocking or patterned pantyhose lying around use them to decorate your pumpkins. Just stretch them over the pumpkin and secure around the stems. Instant decoration that takes about 5 seconds.
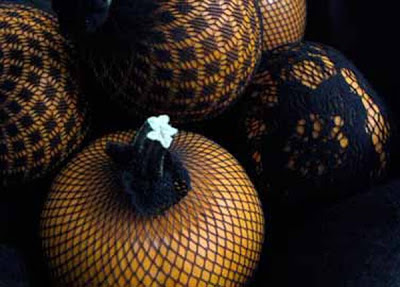
(image via)
5.) This has to be one of my favorite no carve pumpkin options I have seen. They are so fun. We found these from Disney Family Fun and instantly knew we had to make some ourselves. Bat-O-Lanterns!
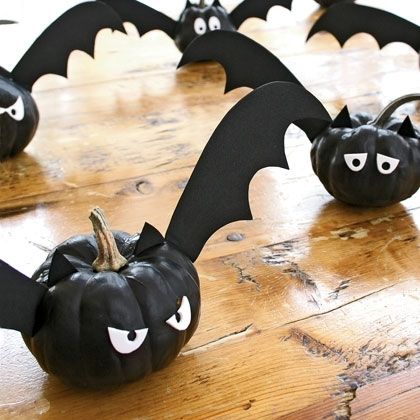
Check out the how-to video here
6.) Now for some cutting of the pumpkin. Don’t worry though, nothing too crazy yet. Use a drill and different sized drill bits to make holes in the pumpkin and create designs that will look fantastic once lit up.
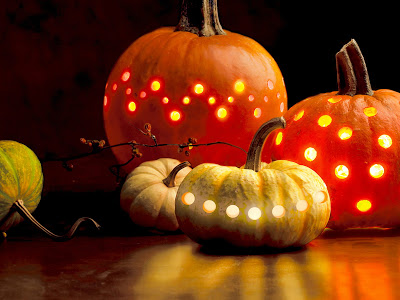
(image via)
7.) Now if you want to start to get a little more advanced with your pumpkins then use a template. There are plenty of kits in the stores this time of year that come with several options and all the tools you will need to create an expert level looking pumpkin. We found these on The Creative Cubby and they even tell you exactly how to carve with templates.
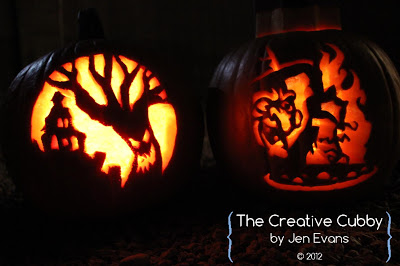
(image via)
8.) Maybe you want to combine some carving skills with some no carve elements like stickers and cutouts. Why not make some funny monsters!
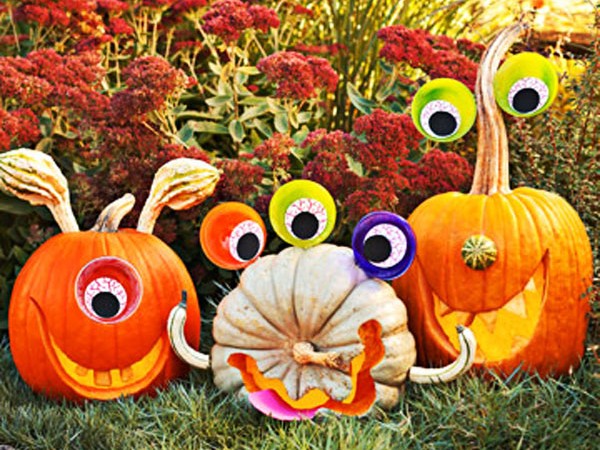
(image via)
9.) Or add a twist to the traditional Jack-O-Lantern and turn the pumpkin on its side using the top as your surface for carving. You can create some neat effects this way just like this one below.
(image via)
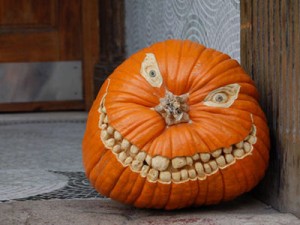
10.) Now if you want to take things to an expert level you are going to have to have some carving skills, but really the sky is the limit. The different designs that you see now with the skilled pumpkin carvers is amazing. Who knew pumpkins would get this elaborate. I never even imagined it as a kid carving my pumpkins.
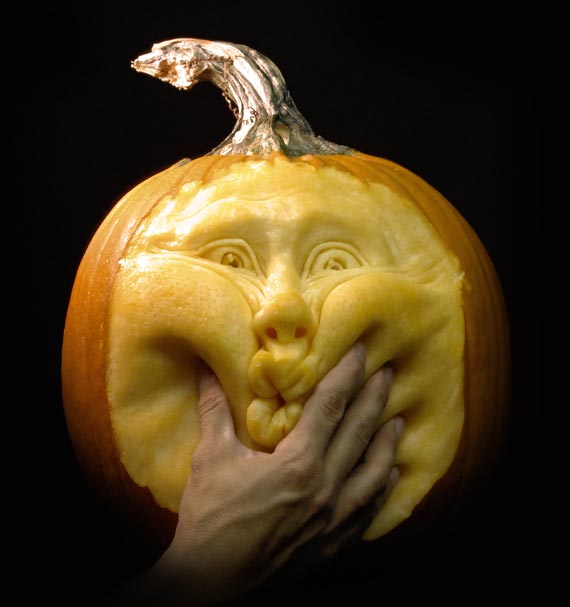
(image via)
Now that you have taken the time to carve your pumpkins you may want to make sure it lasts through the holiday. Here are a few tips to preserve your pumpkins:
- Make sure to properly gut the pumpkin prior to carving and get everything out from the inside. You can then roast all your pumpkin seeds which is a delicious thing to do!
- Extend the life by sealing the edges of the pumpkin. This can be done by coating the edges with a white glue like Elmers or petroleum jelly. You want to prevent moisture loss.
- You can also rub the cut edges with lemon juice to preserve the freshness of the pumpkin.
- Avoid leaving it in the sun for a prolonged amount of time, you do not want too much heat or your pumpkin may start to wilt.
- Is your pumpkin starting to look a little sad? Sometimes it can be revived by soaking it in a bucket of chilled water for a couple of hours.
Hope these tips help. Happy carving! We would love to see what you come up with for your own pumpkins. Don’t forget to show us!
Leave a Reply